Hey ya'll! I know, you're probably wondering where the heck I've been. Well, work has kept me EXTREMELY busy. My business is growing beyond my wildest expectations, and I've been preparing for my super awesome Scrapbooking Retreat that's coming up in July (only 2 seats left!!!). I'm so excited about it & can't wait, but it's kept me hopping! :) I must admit, I'm loving every second of it!!!!
One of my favorite thing to do is blog posting (I know, hard to believe considering I've been MIA, but it's true). I miss doing it regularly. It makes me happy, and helps me keep my sanity. I particularly love doing posts about new techniques that hopefully inspire you guys and motivates you to try something new. So, I've made the decision to introduce Tutorial Thursday. Every Thursday I'm going to do my very, very best to do a technique or tutorial driven post. I'm hoping to do posts other times of the week, but I want you to be able to count on Thursdays.
Let's kick this thing off with one of my favorite topics, art journaling! For those of you who are friends with me on Facebook, you know that last week we had to have our beloved doggy of 15 1/2 years put down. It's been such a painful experience. (I'm planning a blog post soon, but I'm still gathering pictures as a lot of the photos are on film-that's how long we've had our boy.) I believe the best therapy for any hardship, upheaval, or tragic event in your life is art journaling. It's so very therapeutic, and sort of cleanses the soul. There's something healing about putting all of your concentration and thoughts into creating a thing of beauty with your own two hands. Hopefully, that didn't sound too corny, because it's so very true. Art journaling has gotten me through some very tough times in my life. If you are new to art journaling you maybe thinking, "That's great, but where the heck do I start??" Well, my favorite technique for starting a page is collaging the background. What is this collaging you say? Do you remember being in Elementary school, and making collages out of magazine pages and a glue stick? Well, this is the same thing, only for adults. You will need:
-scraps of paper (Thin paper works best such as 7 Gypsies. Can't wait to try the new Mykonos collection for this) and/or tissue paper
-gel medium (I prefer Golden, but Mod Podge will do)
-art journal (you can start with Bristol paper, or any thick paper that will stand up to painting)
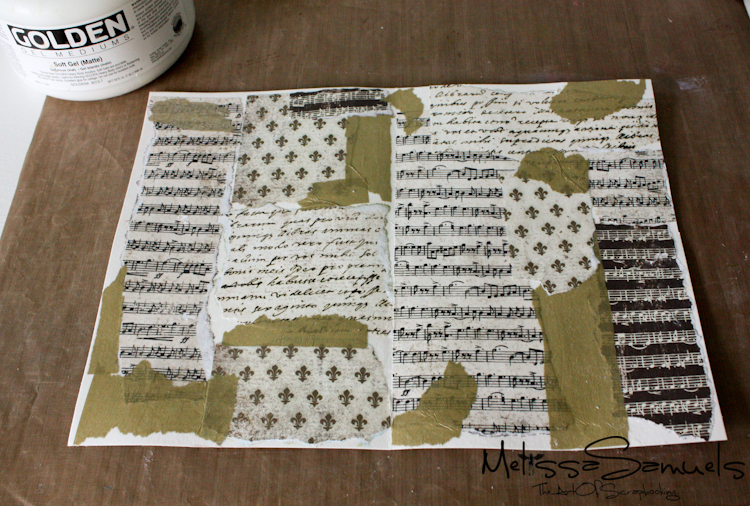
 Start by ripping up pieces of scrapbook paper and/or tissue paper. Here I've used paper and gold tissue paper. I've simply glued down the scraps of paper with gel medium. You want to completely coat the back of each scrap with a thin layer of gel medium to avoid bubbling. With a large area like shown you can apply the gel medium directly to the page, and add your pieces. Brush a thin coat of gel medium over the top of the scraps to seal the edges. This is such an easy technique to start a page. It gives great texture, and the layers add dimension. Let it dry, or hit it with a hair dryer or heat gun. Now you have the base for an art journal page.
Still wondering where to go next with it?? Okay, okay… Since gel medium is paintable, let's put a coat of acrylic paint over the page for some color.
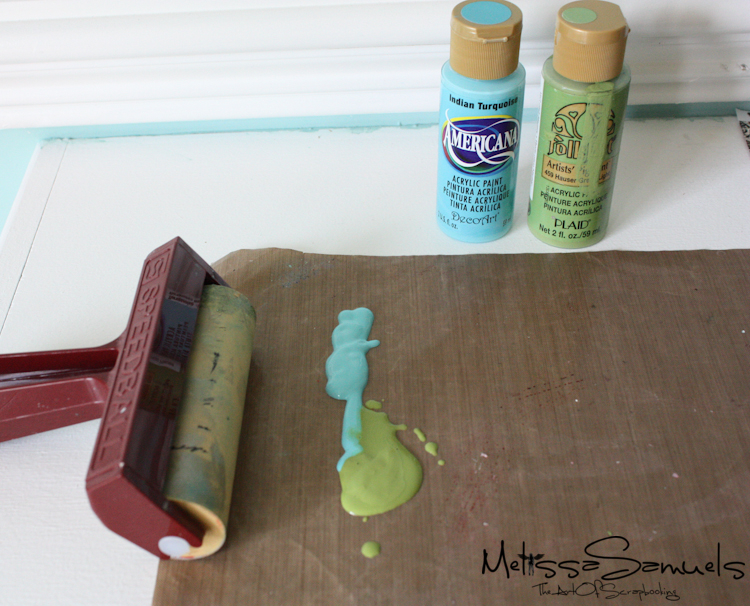
 On a non-stick craft mat I've added a line of blue and green paint. This was probably WAY more than I needed, but I wanted you to be able to see it. Next, pull out your brayer from the bottom of your scrap drawer, and dust it off. I know we all have one, and haven't used it in the last 5 years (or more like 10)! Run the brayer through the paint. If you pick up globs of paint, just run it down your craft mat to remove the excess, but try not to mix the colors. You only want a thin layer of paint because we want our images to show through the paint.
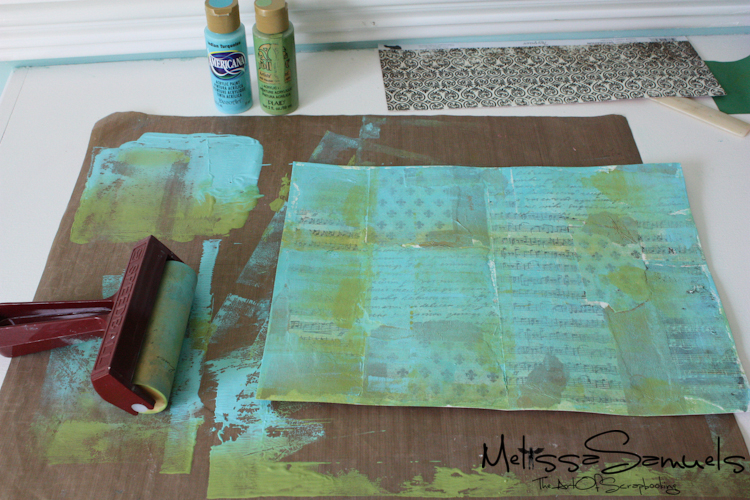
 Roll the brayer over your page. Try not to go over the same place several times because it will mix the paint. In just a few seconds your page is covered, and you have a lovely painted, textured background. Let it dry, and you're ready to embellish with flowers, buttons, brads, borders, keys, metal hardware…sky is the limit! Journal your thoughts, and done!
I hope you enjoyed this technique for Tutorial Thursday! Be sure to come back soon!
Be sure to check out the clearance sale going on now in the online store! Also, enjoy $5 FLAT RATE shipping on all Continental US orders from now until June 30th, 2011.
Linked:


Wow this is so pretty!
Love it.. thanks so much.. see ya next thursday.. oh wait I will be visitng before I am sure… 😀
Fantastic technique, thanks so much for the tutorial!!!!
Now to find my brayer…..
Wanted to tell you how sorry I am about your precious pet! When I say, “I know how you feel” I really do know how you feel. Since I am a grandma and have had many precious ones of my own I have many wonderful memories. I have a pet scrapbook and can only work on it a little at a time. I still am so attached to them all.
Thanks for all your inspiration.
Have a question – I love the gel medium but it is really thick – do you thin it out with water when you brush over the back and front of the papers/tissue you use? if so how much is enough?
wow, love that technique!!! tfs xo Felicitas from Germany
Thanks so much everyone. I’m glad you enjoyed it. Thanks Judy for the kind words. My heart goes out to you. Angel, it sounds like you are using either regular or heavy gel medium. You’ll like soft gel better, it’s a thinner consistency.
Thanks for this tutorial, I learn new here.
Betinna
Always enjoy your inspiration! This looks like a fun way to just get lost and enjoy.
So sorry to hear about your fur baby- I know it is hard to lose a member of the family.
Sending you hugs.
blessings to you, Dawn ll
Great tutorial.My heart goes out to you for the loss of your pet-I know how hard that can be.
That’s really cool, Melissa! Fun thing, but I always have my brayer out and I use it all the time! I take plain white cardstock and brayer over an ink pad and roll it out covering the cardstock. I just love the uneven markings it leaves and I can use it as a background for a page LO or cut designs and punch out letters…I think of tons of things to do with it!!! 😀
~Vanessa W
Hi Melissa! You found me or I found you but anyway I’m happy about it! I love your blog and this tutorial. I also am going to tell my son about the “Dark Hollow Falls” trail; we live in Northern VA and he likes to hike around Skyline Dr. It will be fun to get to know you and your fab art work!!
しかし、最古の共同SBから10年以上昔のものがあるので、新しい靴の値は、特定の記念の型を持っています。古典的な赤と黒の色、非常に活発なナイキとクリティカル亀裂デザインと。約166ドルの新価格は、友達のように、ご注意ください。