Hi Everyone! I have been working a lot in my art journal lately. To reduce the amount of bulk in my journal so that I can get it closed, but maintain dimension, I have been stamping. I find myself drawn to foam stamps, but the selection is limited. I did a tutorial awhile back on how to make your own foam stamps using the Vagabond (click here to view). I love using specific shapes, but for my art journal I have been focusing more on creating backgrounds. I thought it would be neat to create my own custom background stamps so that I can get the patterns that I want and control the size of the image. You will not believe how simple they are to make, and extremely versatile. They are very inexpensive, and you are only limited by your imagination. Today, I am going to show you how to make a brick pattern background stamp that I made specifically for my art journal, but don’t feel limited. These stamps are great for minis, layouts, and even cards.
 Let’s get started!
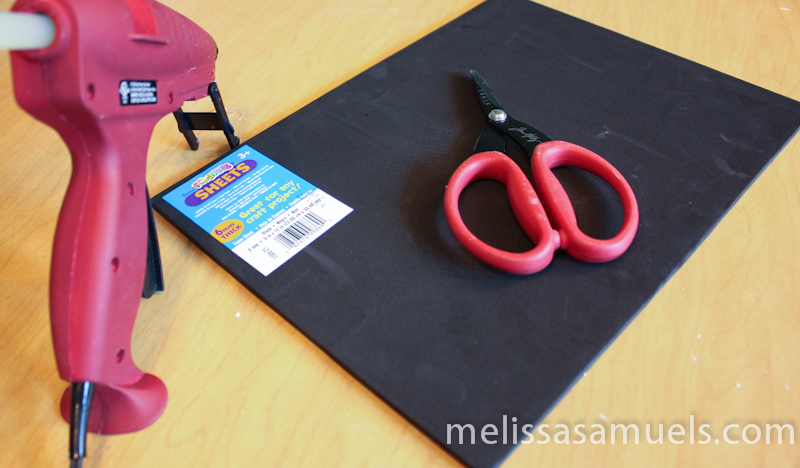 All you need is a sheet of 6mm foam (I used 9×12), hot glue gun, and scissors. It’ that easy!
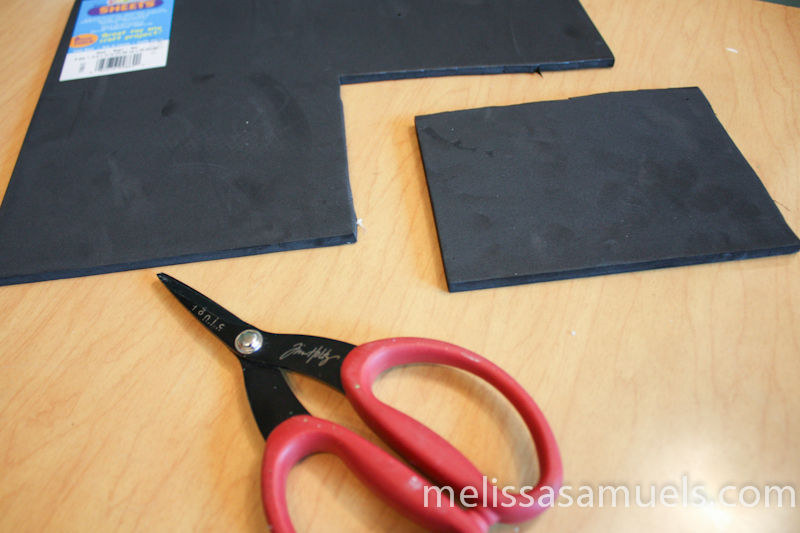 Start by cutting the mount for your stamp. The fun thing about this project is you can do any size you would like. Customize it for your project. For example, if you are a card person, make the mount the size of a card, and maybe decrease the size of the bricks. Let your imagination be your guide. For this demonstration, I cut mine to 5 3/4″ x 3 3/4″.
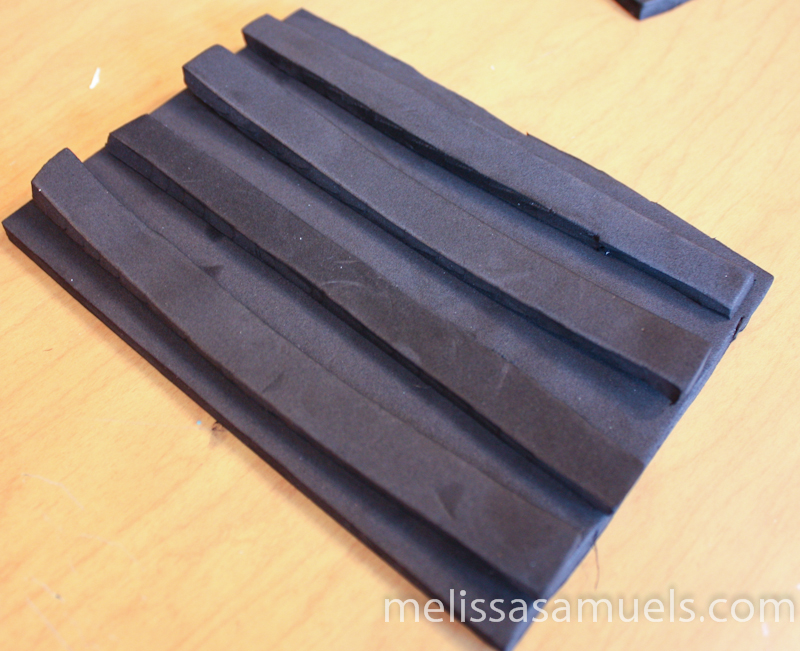
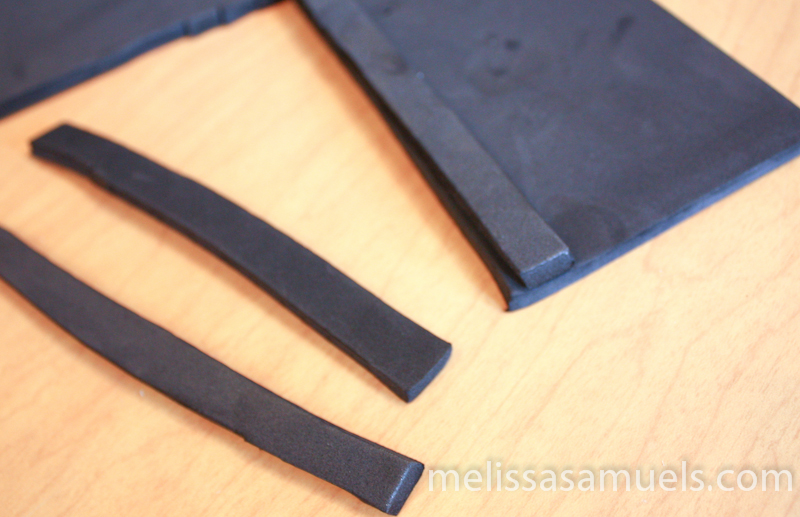 Cut 4 approximately 1/2″ wide strips from the remaining 5 3/4″ foam. Use the first strip as a guide for cutting the other 3 strips to get them close to the same size, but it doesn’t need to be exact.
 Line up all of the strips on the mount for spacing purposes.
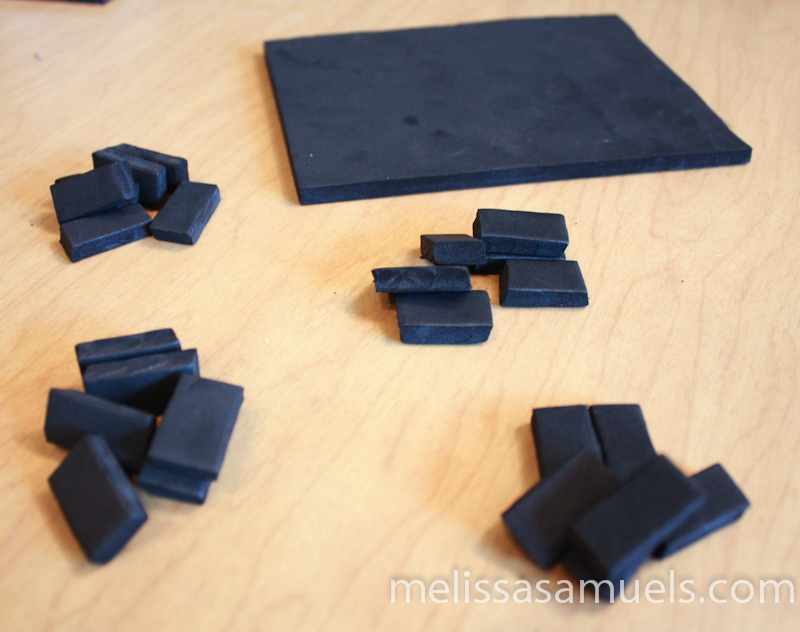 Once you know you have a good fit, cut the strips into little bricks approximately 7/8″ long.
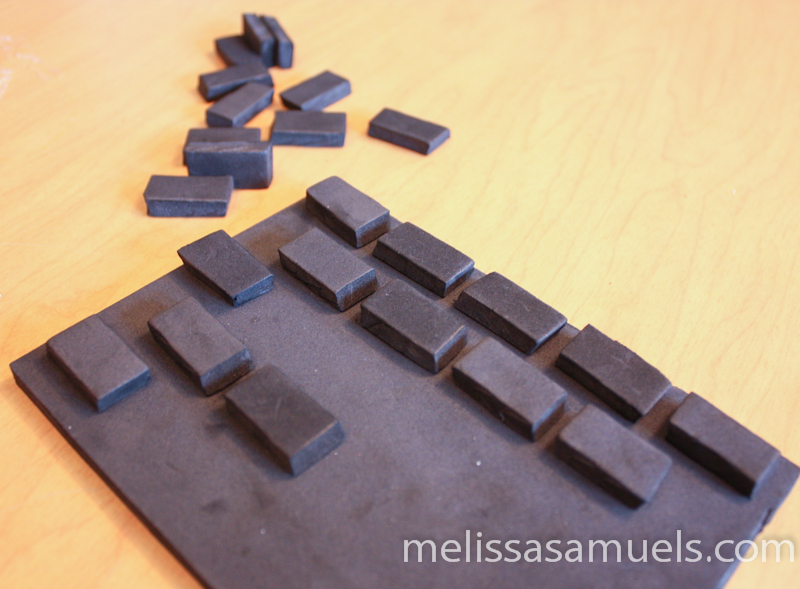 Line up the first horizontal row of bricks, and the vertical edge for spacing, staggering every other row of bricks.
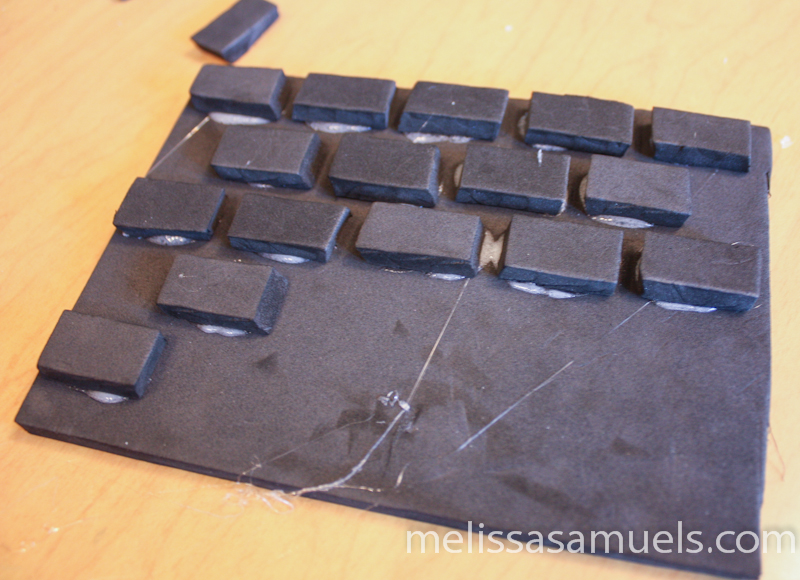 Glue the bricks into place using a hot glue gun. If the glue oozes out, that’s okay. It won’t effect how it stamps. The great thing about hot glue is that you have a few seconds to reposition the foam before it cools, if needed.
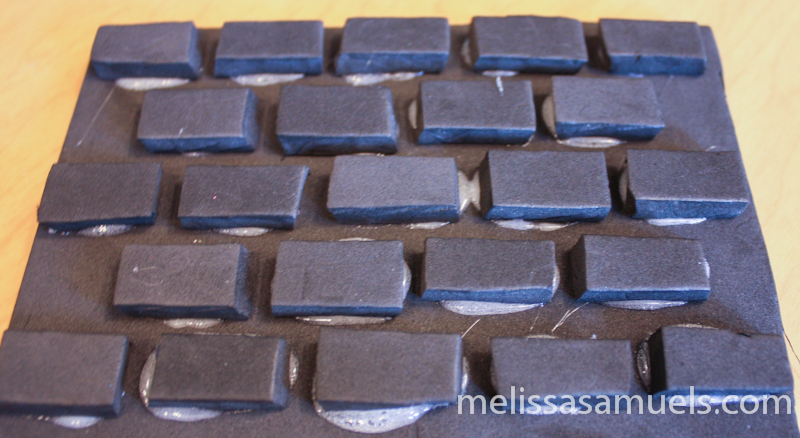
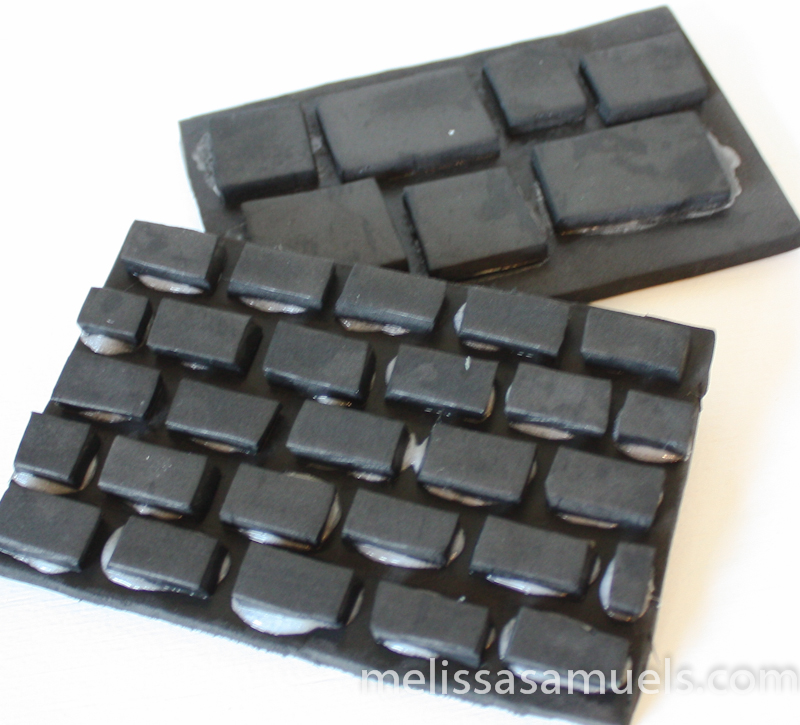
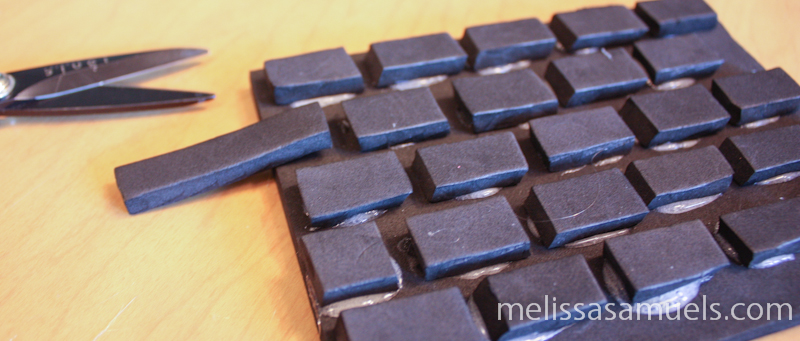 Once all the bricks have been glued into place, go back and cut the end pieces for the staggered rows. Get rid of any hot glue “webs.” Done! Now you have a custom made stamp. Here are some ideas on using your foam stamps.
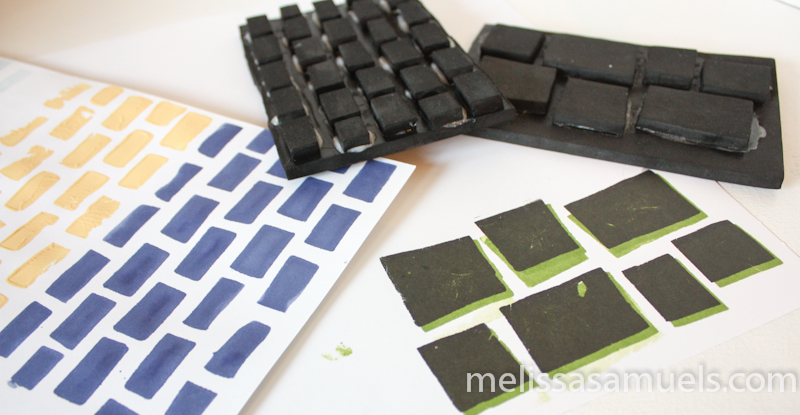
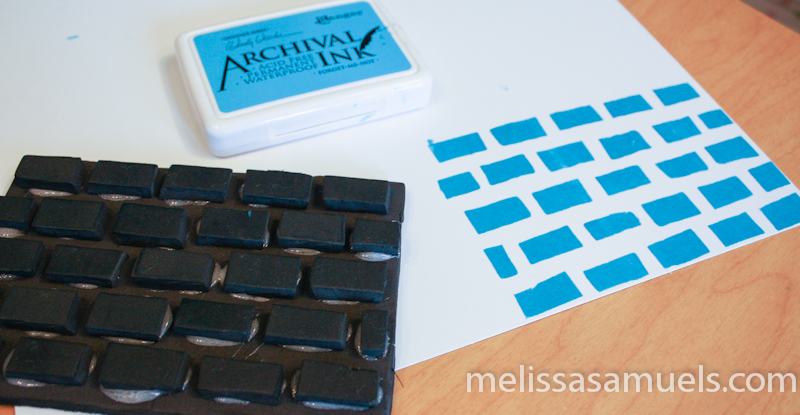 Here is an example using Forget-Me-Not Archival Ink. The wonderful thing about Archival Ink is it is a permanent, waterproof ink, so once you stamp & dry it you can add wet media over it.
 Here is an example of using ink spray for a watercolor effect.
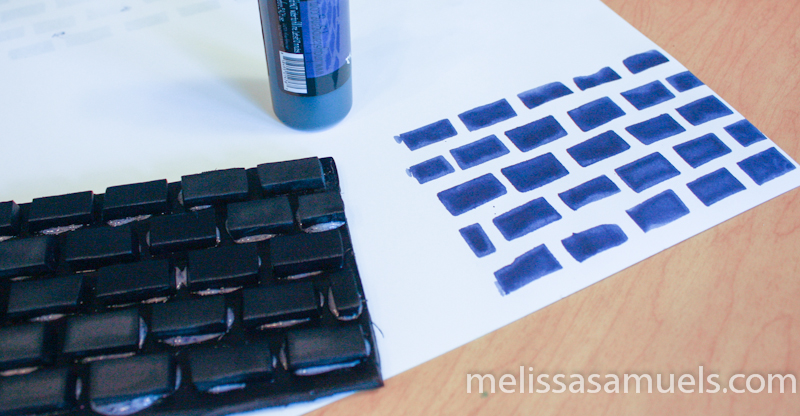
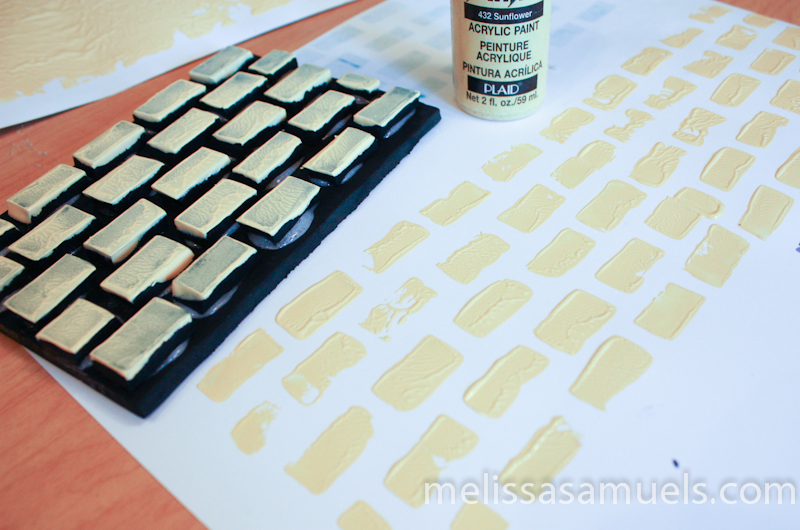 Here is an example of using acrylic paint.
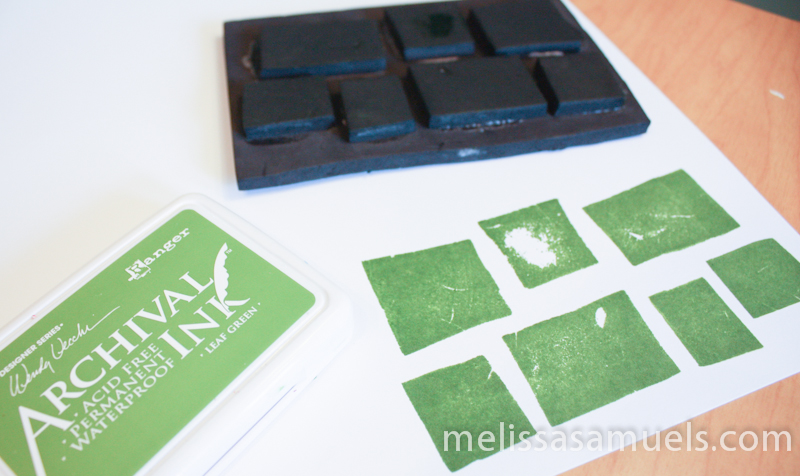 Here is another pattern I created and stamped with Leaf Green Archival Ink.
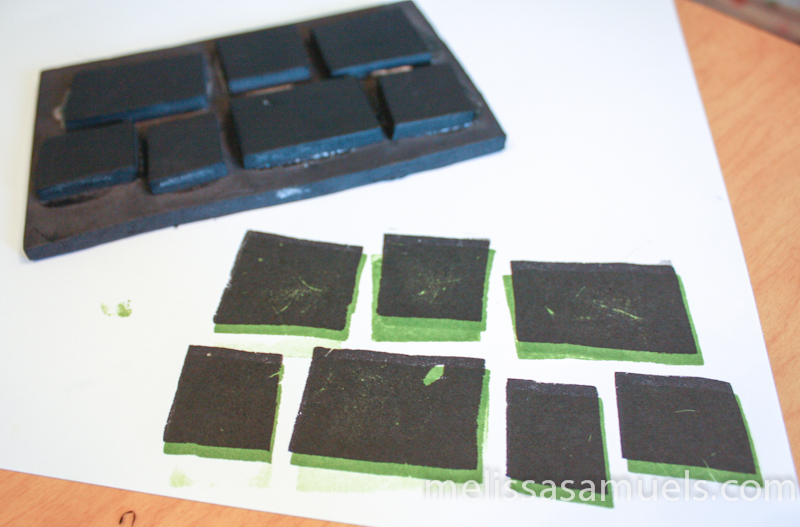 To get a 3D effect, I stamped over the green with black ink, off-setting it just a bit.
 Also, cleanup is a cinch. For all of the mediums I used, I just rinsed my stamp with soap and water while it was still wet. Once dried, it’s ready to go again.
The next time you are looking for the perfect background stamp, but just can’t find it, make your own! The possibilities are endless!


3 responses